What is a Node.js Interpreter?
Node.js interpreter is installation of Node.js either on your computer (local Node.js interpreter), a remote host or in a virtual environment (remote Node.js interpreter).
Steps to Use Node.js Interpreters on Remote Host
1. Go to IntelliJ IDEA/WebStorm and create a Node.js project in it.
2. On the server that is been used, install alt-nodejs packages.
3. Then create an application on the server in three ways as below:
- Via UI of the Node.js plugin.
- Using the below command to create an application:
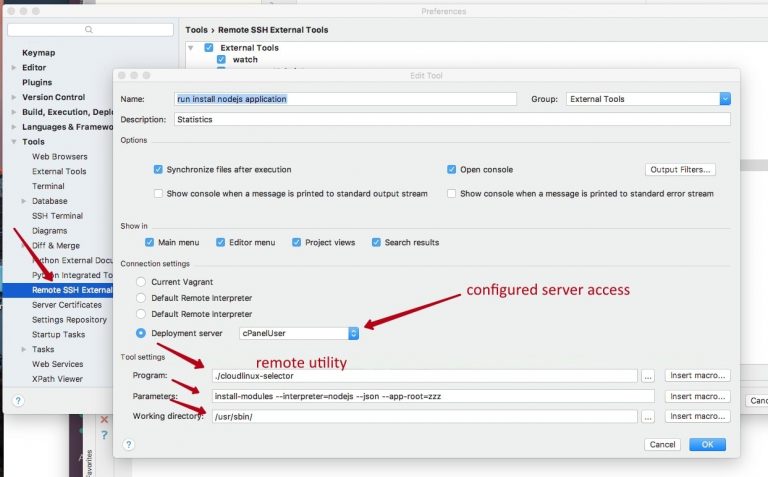
Note: You can create and run any remote script in the IntelliJ IDEA (Preferences — Remote SSH External Tools — Add).
- Select a location of the application on the server and adjust the files with the IntelliJ IDEA project.
4. In the project, set up Run/Debug Configurations.
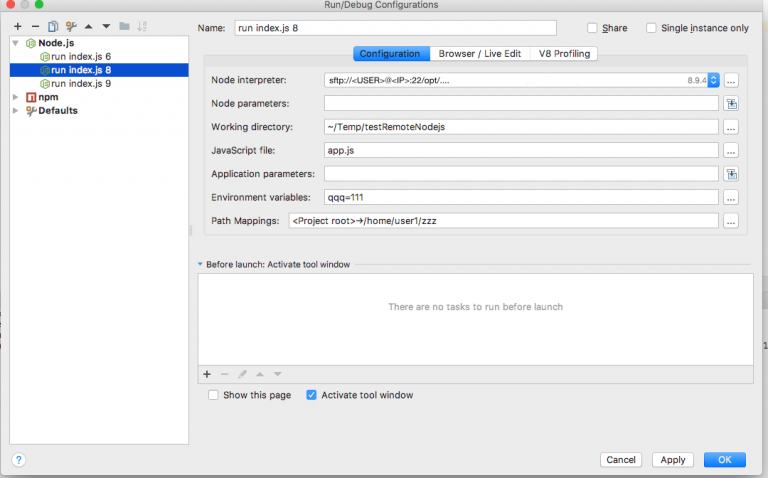
- Give a path to the remote Node.js interpreter. For indicating the remote interpreter, it is important to install the Node.js Remote Interpreter plugin first.
- Mention the initial JavaScript file that will be run with the node command (the file name is app.js and is found in the archive).
- Mention Path Mappings between a local and a remote project (Preferences — Deployments — Add). In case your application is created with the cloudlinux-selector utility or using the plugin UI the Path Mappings should be as below:
5. Arrange the project directories on the local and the remote machine as per Path Mappings mentioned.6. Using the npm install command, deploy the modules on the remote and the local machine (if there are dependent modules). In the UI, you can click the Run NPM Install button.
7. Run Node.js application with the same configuration which was set at the 4th step (Main menu — Run — Run… — Select configuration).
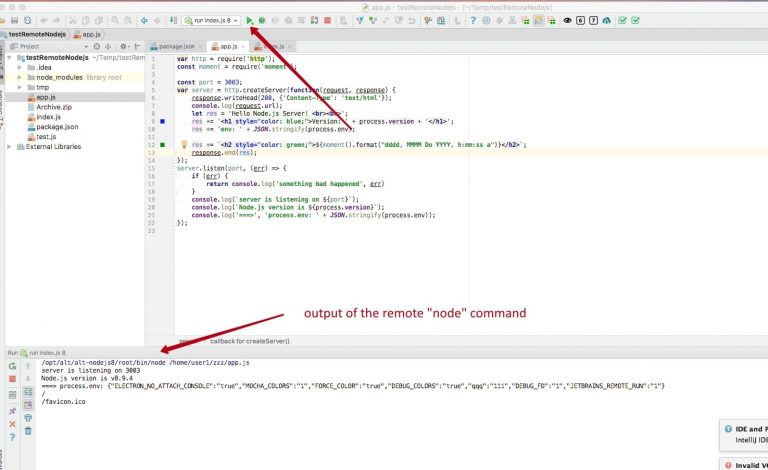
8. In case the application you are using is from the archive attached, you can see the running application on the 3003 port — http://DOMAIN:3003.
Note: The port should be available to a server user.

You will see the following information displayed on this page:
- The version of running Node.js interpreter;
- Variables of the Current environment;
- The current time.
With this, you can ensure that deployed modules are used properly.
For using the different version of Node.js to run an application, modify a path to the interpreter in the configuration settings of the running.
Adjust all changes with the server and restart the running application to apply them to the project.
9. Set breakpoints in the code and run the configuration via Main Menu for debugging a script (Main menu — Run — Debug… — Select configuration).
Note: There is no need to install Passenger while working in IDE if you follow these steps.
This is how remote usage of Node.js Interpreters is done.
